Sunday, February 27, 2011

Every now and then...

...you get an envelope job that is problem-matic. I’ve dealt with many difficult issues. Dark envelopes that I can’t use my light box and templates, bleeding envelopes, rough hand-made paper envelopes. Over the years I’ve found ways to resolve all these issues to complete the jobs.
Well, last week I got a job that tested my abilities. I was told that they were ‘kraft’ paper envelopes, so I anticipated them probably bleeding. So, I tested one. It was like writing on a brown paper sack from the grocery store, and yes, bleeding like crazy. My normal fix for that is to spray them with spray fixative, so I sprayed all of them. Still bleeding. Hmmm, sent out a question to a few of my calligraphy colleagues to see if they had any other suggestions.
Someone suggested hair spray and adding a few drops of gum arabic to my navy blue acrylic ink, another couple suggested powdered sandarac. I’d tried the later while waiting for a response, and had no luck. So, I tried the hair spray and gum arabic, luckily we had an old can in our medicine cabinet in our bathroom. I hadn’t used hairspray in years, anyway, gave an envelope a good shot, let it dry and tested it. Viola, it worked! Now, I did go out the next day and buy a new can, and it seemed to work even better. I hope the bride didn’t notice the distinctive scent of hairspray.


Oh, and did I mention that these same envelopes required pointed pen lettering, and the pen would pick up fibers of the paper? And, did I mention that I couldn’t see through the envelopes, so each one had to be ruled? Lastly, did I mention that there was a nice letterpressed image of coral on the bottom front of the envelope requiring my planning the address around it? Whew! 
I guess the only good thing about it was that there were only 50 to do. And thank goodness the table and escort cards are on a nice ‘regular’ paper, as I will be finishing those up in a couple weeks.
Evie antics: She’s started saying and identifying colors. So far, yellow is the clear favorite, but ‘bu’ is a close second. Hey, those are my college colors! Go Eagles!

Until next time, Jen

Sunday, February 13, 2011

Valentines and other work

There were a few Valentine’s floating about the studio this week. But, more on that later.
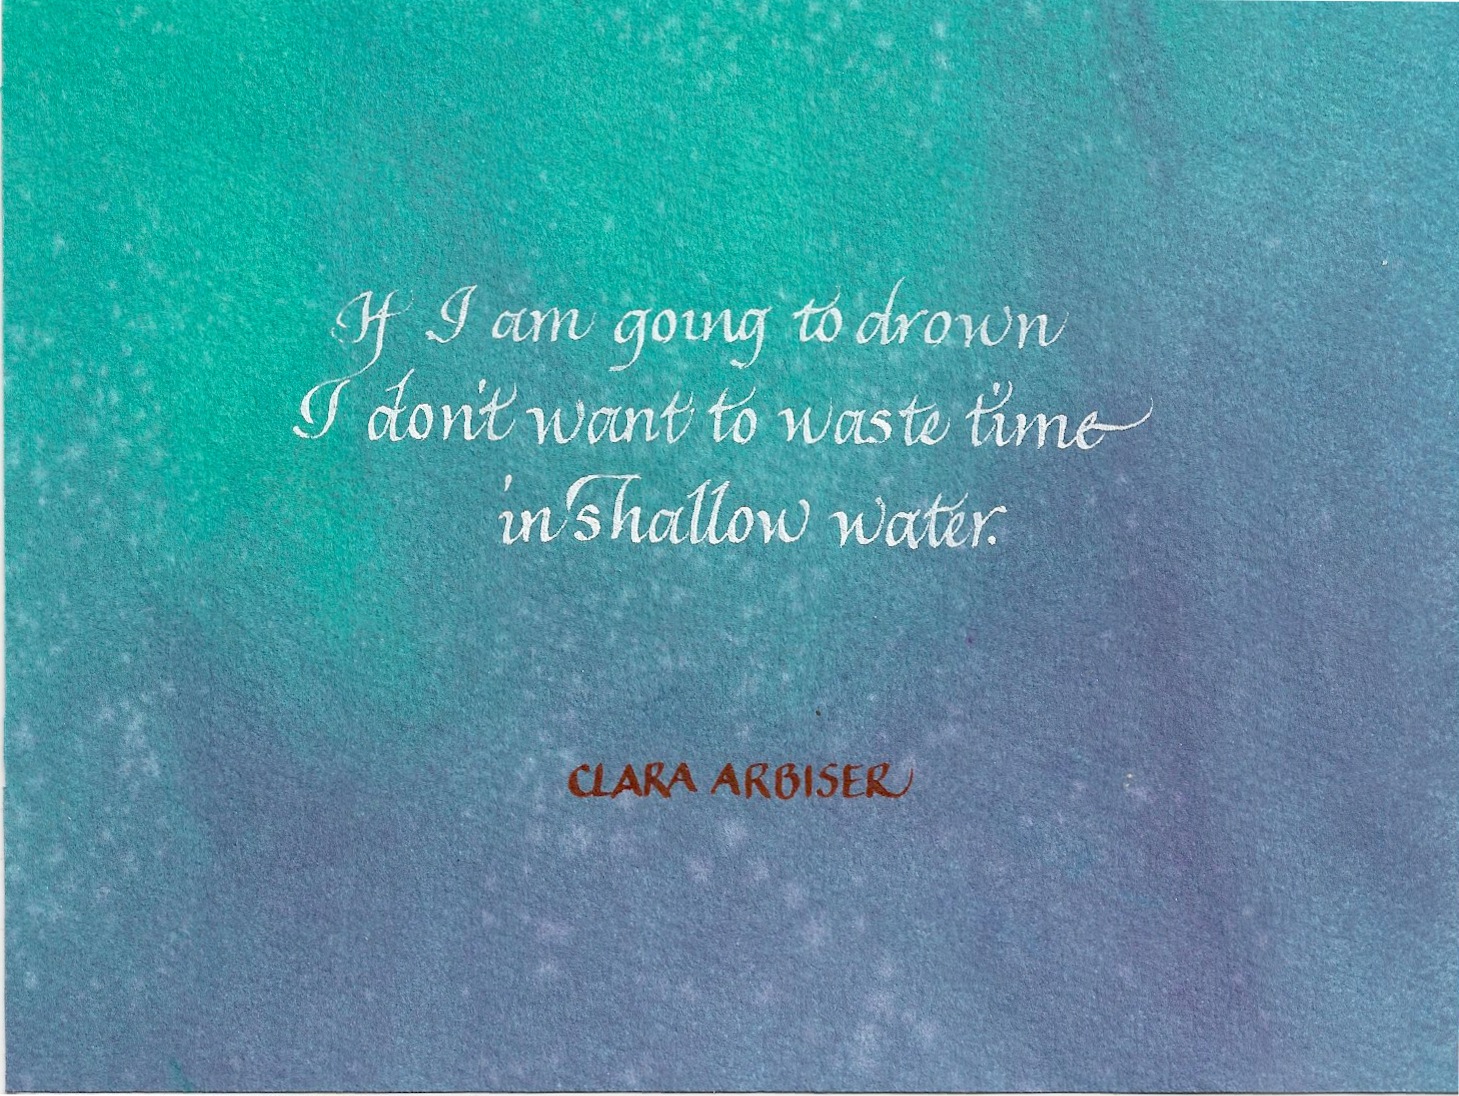
A friend on Facebook referred another friend to me. She had been at a Chamber dinner and the speaker was very inspirational, so much so, that she wanted one of the woman’s quotes done in calligraphy. It’s a great quote, really.
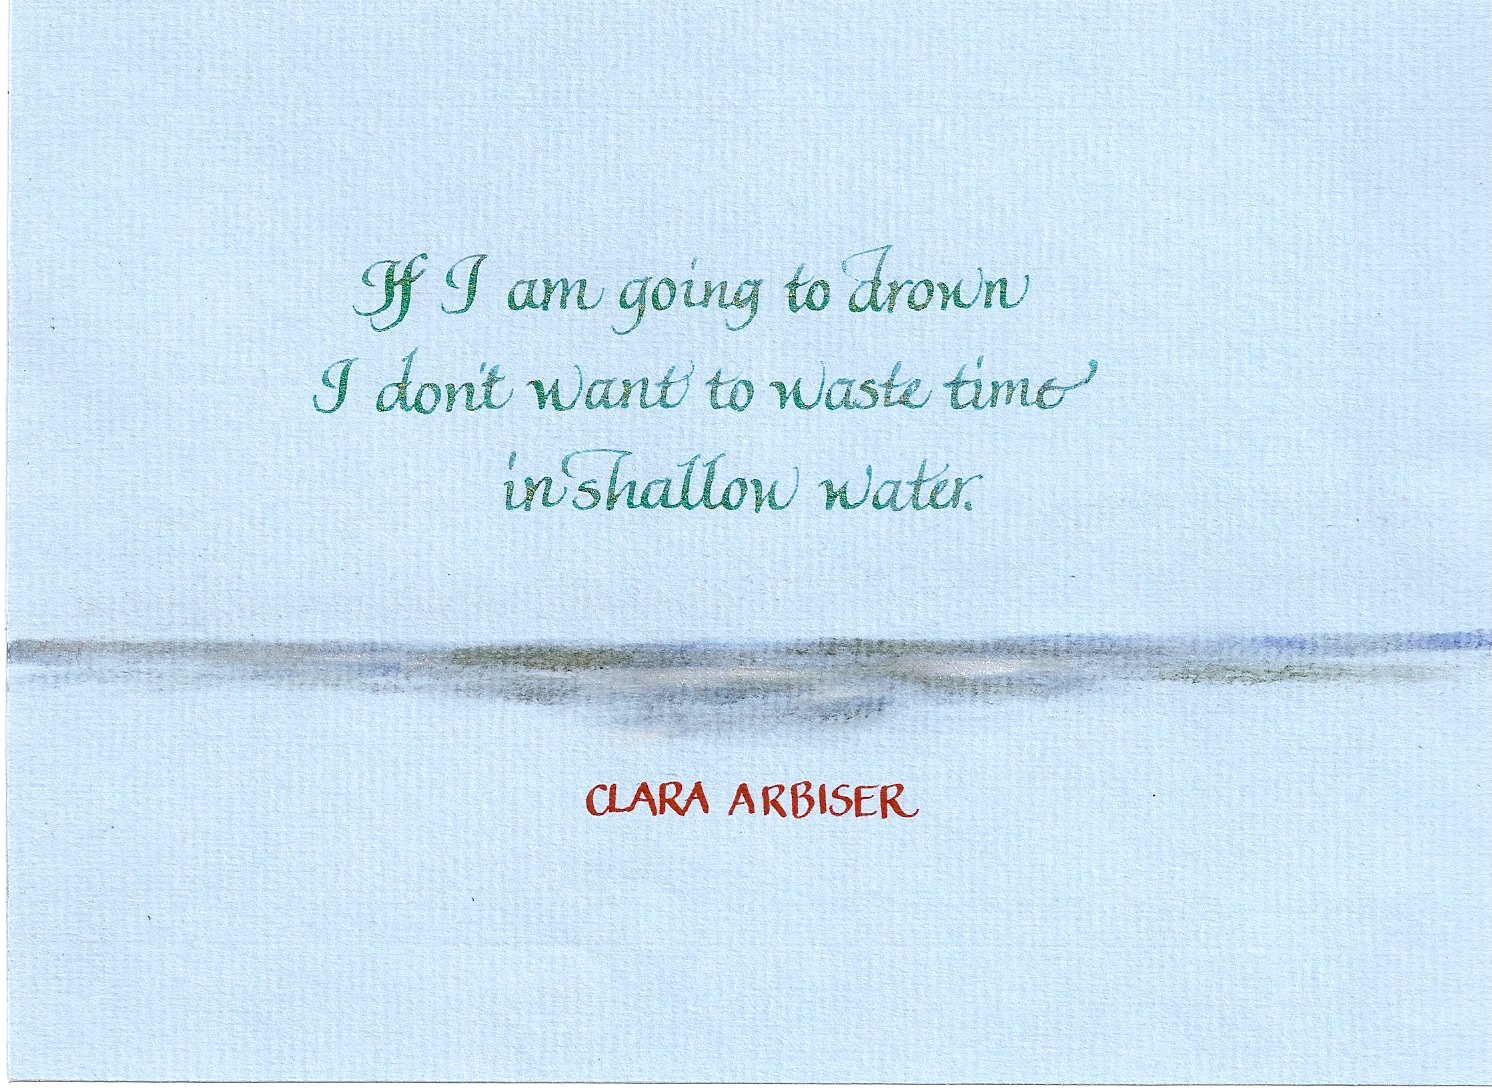
"If I am going to drown I don’t want to waste time in shallow water."  — Clara Arbiser
I wrote this out a couple times on gridded layout paper, and my muse must have been with me because I was happy with the lettering right away.
Now, for colors, I made some suggestions to the client after I took some inventory of my massive stock of paper. The obvious imagery would be to use blues, but the client also wanted to incorporate some of the lady’s personality into the piece. She is from Argentina, and was very vibrant and passionate, and wearing the color red. So, I suggested doing the lady’s name in red, but much smaller to not over power the other wording.

I chose a piece of paste paper that had bold blues and greens with subtle spots, from what, I’m not sure, but thought it could look like drips of water. The client really couldn’t visualize the white lettering that I suggested, so she wanted a more subtle blue for the paper. So, I chose a plain light blue paper and did the lettering twice. On one of them I added some pastels to look like calm water. I also did the white lettering on the paste paper just so my client could see it.

I scanned all three examples, and sent them off to the client to see if she liked one of them. She liked more than one and wants to have 2 of them, the paste paper with white lettering and the light blue one with the pastels. Bingo! But, I’m just glad she liked my work. This has happened more than once for me, so I’ve found that it’s always a good idea to give the client choices.

As for the Valentines, I made some simple cards that I saw a design for at Archiver’s this time last year. It started out that I just wanted to send a couple to my nephews from Evie. But, ended up making them for other family members to thank them for their baby sitting services.

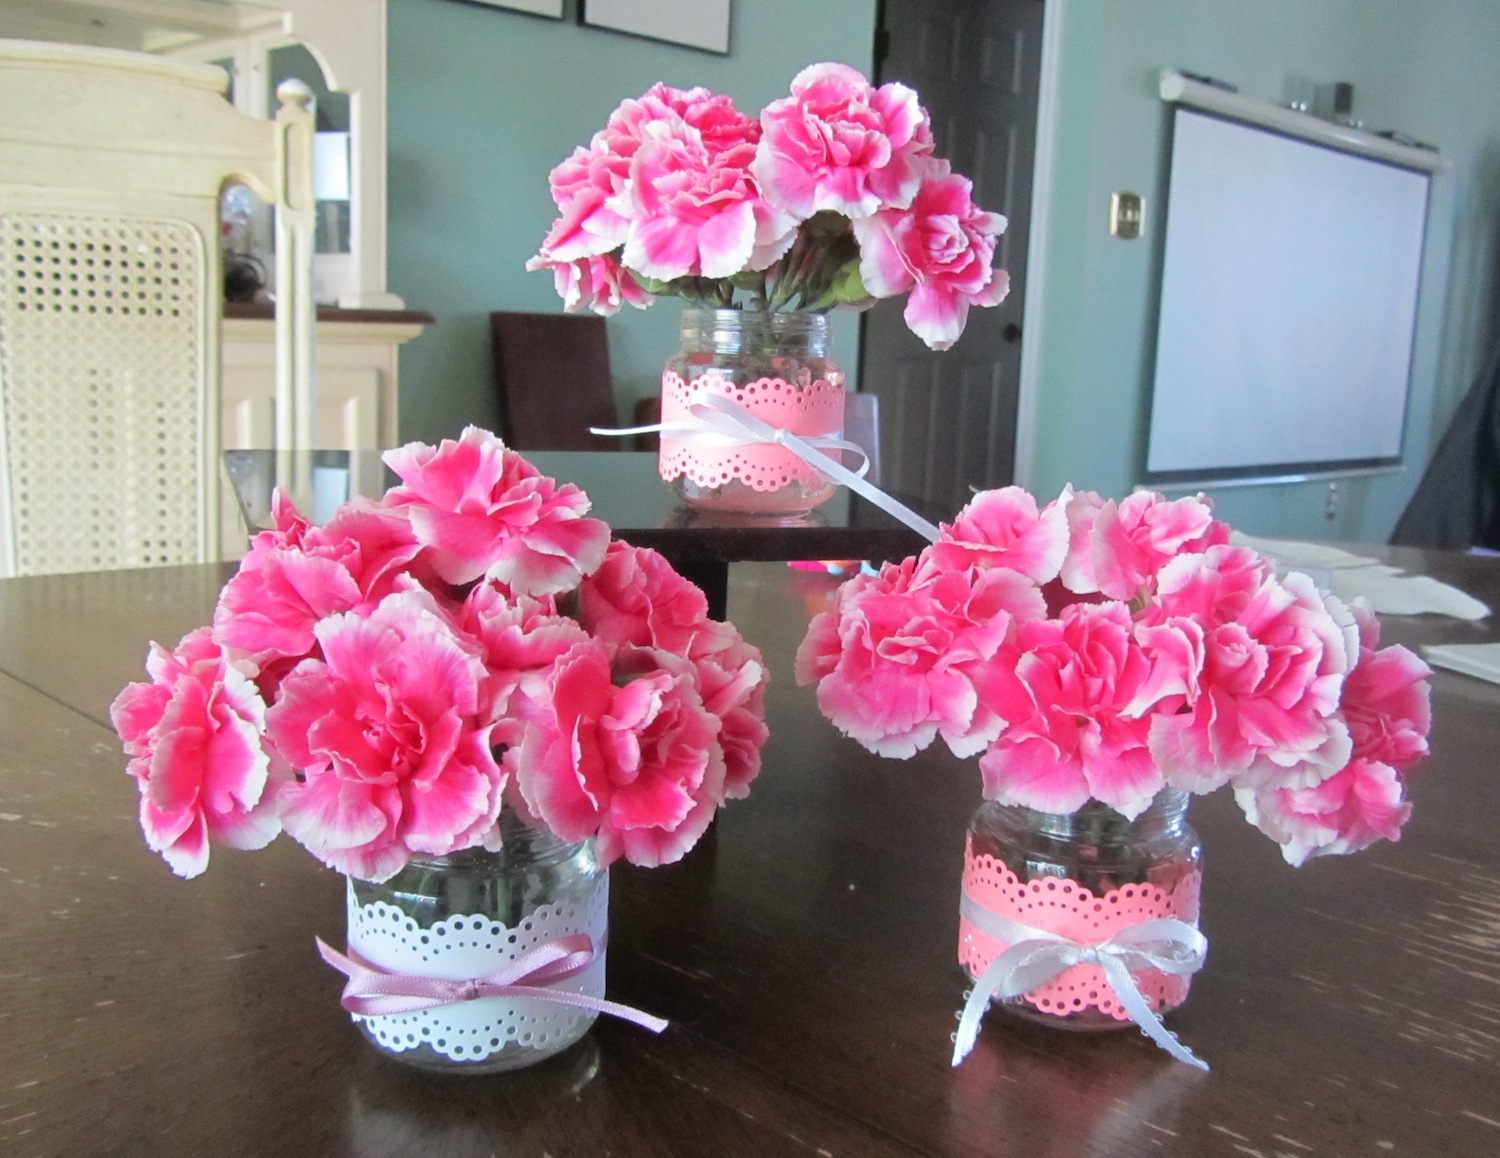
Then I had a thought of a use for all the baby food jars that I saved after Evie was finished with them. Broke out my doily punch, (see my last blog post for more on that) and made strips to wrap around the jars, tied a ribbon around it, added flowers and viola, Valentine bouquets. They look very spring-like, don’t you think? And since it was almost 60 degrees today, we can only hope that spring is right around the corner. But, personally, I'd like a few more pretty snow days to cover all the gray & brown of the trees and grass.
Happy Valentines Day!

Thursday, February 3, 2011

Evie’s 2nd Birthday Party

I love playing with paper and paper products. Every year, except this one, I make handmade Christmas cards to send out to family and friends. So, naturally, I want to do the same for Evie’s birthday invitations. I’ll do it as much as I can until she asks for Dora invitations or something else.
So, how do I start out? I think about the cool things I have that I want to use. I have a really cool doily punch by Martha Stewart so I started thinking about how I could use that to incorporate into the invitations. So, I punched a strip of white paper on 2 sides to make a doily strip. I used an almond colored paper for the base of the card, but also wanted to add some ‘girly’ pinks or other colors. Ok, I cheated on the writing here. I used a cool set of alphabet rubber stamps on the lace strip to say ‘Peek a boo, look who’s turning.’  Then I hand cut the number ‘2’ out of Japanese origami paper, and added the flower. 

I printed out the words of the invitation on a white paper to insert inside the invitation. I used the doily punch on the top and bottom edges and added a cute little photo of her and tied it all together with some string.
Done, mailed them out.

Next up, the cupcake picks. I remembered that I had bought some cool doily stickers at Big Lots last year. I had intended to use them in the design of a wedding invitation suite that I did last year, but the bride wanted to go in another direction, so I have a bunch of them. I just needed to find them in my, let’s just say, temporarily disorganized studio. I figured the best way to find them was to start putting stuff away, and it worked. Just as I was about to give up, ta da! they were found.

I used a 1.5 inch scallop punch in the almond paper, topped that with a pink circle, the doily sticker on top of that and the final touch, a gem in the middle. Glued them to sticks. Done. Note: I was asked a question on how I attached the sticks. First, they are kabob skewers that I cut into thirds or approx. 3 inches long. I used a hot glue gun to attach them and did not have something on the back to cover them. As an option you could do that if they were going to be viewed from both sides.

Last year I had wanted to make a window banner, but time ran out, we had a death in the family and her party was very small, so it got skipped. More time this year, so I had to come up with something to match the rest of the paper products.
I went to one of my favorite scrapbook stores, Archiver’s, and bought a package of 10 scalloped edge 5 inch circles. I cut a 4.5 inch circle of the almond paper. Then, at another favorite store, JoAnn’s, I bought 4 inch paper lace doilies and layered it all together. I punched a bunch of white scalloped edge circles and then did brush lettering on each individual one. I didn’t think ‘Happy Birthday’ would fit, so I opted to write ‘Evie is 2’  The space between the words have a stamped flower and a paper flower on top of that. Lastly I punched holes in each side of the large scallop and tied them all together with 1/4 inch organza pink ribbon, added long tails on each end to hang across the window.

Luckily, I had almost all of the paper products that I used, saving me some $. All I bought were the large scallops, paper lace doilies and some ribbon. Today I re-purposed the leftover cupcake picks to use on the thank you notes that I need to write. I had fun making all of these and hope I can catch up on my scrapbooking and use all these fun items for her 2nd Birthday page.
Evie antics: She had the most fun with the helium balloons and the puzzle that her grandma sent from Georgia.

In the studio: For the thank you notes, I had a whole box of small envelopes that had gotten moist and the flaps were sealed. I didn’t want to toss the whole box so, I sent a question out to my calligraphy friends on Facebook to see if anyone had some advice for salvaging them, besides steaming. I steamed a few open, but it was tedious, time consuming and dangerous with the hot steam. The envelopes also look a bit worn from the process. One of the ideas that was sent to me was to put them in the freezer for 24 hours. I was excited to try this as I thought it might work. Sadly, I just took one out and tried to get the flap unstuck, it sort of worked. Parts of it came undone, but the rest tore. Not the result I wanted, but hey, worth a shot. I’ll try the steaming with a hot iron and damp cloth next, but if that doesn’t work, they will be tossed.

Thanks for reading. Jen

Wednesday, January 26, 2011

Getting ready for the Guild’s 30th Anniversary Exhibit

The Greater Cincinnati Calligrapher’s Guild is celebrating 30 years in existence this year. In Nov. we had a wonderful dinner party to celebrate, and to cap this off, the guild will be having an exhibit of wonderful calligraphic artwork at the downtown Cincinnati Library starting Feb. 1 through March 10.


By the way, I designed the logo we’ve been using for all the anniversary events.
I had a deadline to deliver my pieces of artwork in mid Dec. One of these pieces was started in May, and was shown as an example at several guild meetings as a ‘work in progress.’ So, it was finally time to finish it.
The piece was started in Jacqueline Sullivan’s Wet and Wild workshop. I was workshop chairperson and coordinated putting this workshop together. It was touch and go with this workshop between getting enough people to attend, to having to change the venue the week before the workshop. But, that’s whole other blog story for a later date.
The background of the piece was made by pouring watercolors onto the wet watercolor paper. While the paper was still wet we could do some other things to it to move the color around, but really, there was no control of how the paper would look in the end. It was very freeing to just keep creating papers and experimenting with different techniques to see what happened.


This particular piece has the effects of sprayed on rubbing alcohol, as seen in some of the whiter areas. Also used was a sprinkling of dry Rit dye that shows up as dark spots on the bottom.
Once the paper was dry we went about layering different coordinating pieces to build up the piece and plan where lettering could go. Now, I had taken this workshop before, so I knew some of the tricks and techniques already. Using foam core to raise the layers off the background, remembering to use the ‘odds’ rule to make a piece more interesting.
I’m not sure what my thoughts were regarding choosing the quote for this piece. I had done that quote before, so maybe thinking about leaves and the green color of the piece, may have contributed to my decision. I recall that I did a couple different styles of lettering before deciding on the all caps variation of Italic. I used navy blue Ziller ink for the lettering and the word ‘Life’ is done with Pan Pastels, which I love using.
To finish it off, the piece is framed in an oak shadowbox frame. I had contemplated spray painting the frame a gold/brass color to match the gold in the piece, but ran out of time. I still might do that at a later date. Maybe I should have everyone vote.


Although I posted the end result in my Fresh Art album on Facebook. I wanted to share some behind the scenes insight into this piece of artwork.


Lastly, if you are in downtown Cincinnati, stop by the library during their business hours to see the exhibit. I have another fun piece in the exhibit entitled 'Now I Know My ABC's' Can you guess my inspiration for that piece? This exhibit will definitely show that calligraphy is more than just beautiful handwriting, it is an art form in itself.


In the studio:
I’ve been busy working on paper products for Evie’s 2nd birthday party which is this Sun. Can’t believe my baby is turning 2. Invitations, cupcake picks, and a banner for the window. I’ll show them off in another posting soon. 


Evie antics:
Her Dad downloaded a new app for her iPad. It’s a Dora Coloring Adventure. You choose the picture, add stickers and color it in by touching a crayon color and touching the screen. She got the hang of it really fast. She likes making everything a monotone and lots of stickers.
Until next time, meanwhile ... Go Steelers! Stairway to Seven....
Jen

Tuesday, January 4, 2011

Happy New Year!

My latest musings...
I started the year off right, got my butt in gear and started and finished my first wedding job of the year. I’ve had it sitting in my studio since early Dec., and had promised the completed job by the first week of Jan., taking into consideration the holidays. It was a small job, only 51 address, so I completed it in about 2 days, with some babysitting help from the hubby. Or as our friend, Melissa, calls it, “parenting,” when it’s your own child. The lovely bride and her family are from just up the road in Springboro, Ohio. This was a reject envelope since the zip code was incorrect. A great resource for checking zip codes is www.usps.com I've used that site many times when a zip code is in doubt, incomplete or omitted from a wedding list.

It was nice to do some mindless practicing of a font that I know very well. The Bickham font. I even worked on perfecting some of the letters that I’ve formerly had issues with. The paper was nice and I started the job with a new nib, a Hunt 56, and my usual black Sumi ink. This is a print sample of the font.

As for resolutions for the New Year, well, can’t say I’ve verbalized any, but have a few things in my head that I’d like to get accomplished. Lose about 20 lbs. to start. But, as always, try to have more time to be creative. That could take many forms, calligraphy, jewelry making, playing with Evie or even writing this blog. I already have a few more article ideas brewing for upcoming posts.
Evie Antics: I thought I’d share this photo of Evie playing with one of her presents from Santa, an Aquadoodle. I’m trying to get her started on her creativity too. Oh, and she's using her right hand, which is rare, since she usually colors with her left hand, so I can't decide which it's going to be.


Until next time....Jen

Wednesday, December 22, 2010

Getting started

Whew, two days before Christmas, and what am I doing, starting a blog. Never mind the cookies that aren't baked, the presents begging to be wrapped, or the handmade cards that were not sent this year. I've been too busy. Over a year ago I started/opened my Etsy shop and I've had mixed results. Most of my business has come from brides looking for wedding invitation calligraphy, or, by my bidding on projects in the alchemy section. I remember being disappointed at Christmas last year that none of my calligraphy was purchased. So, this year I came up with a few new ideas, and it really paid off.


In Sept. I listed a vintage baby block ornament, made of wood, scrapbook paper and my hand lettering. I followed that up with a wedding ornament. Between the two, my count is up around the 30s in the number that I've sold. Sent my last one out yesterday, I think. I enjoyed seeing all the new baby names. There was even another little Evelyn or 'Evie' as they are calling her. I've got ideas for new block styles, I just hope that ornaments sell in the non-Christmas season. Maybe a Valentines version. And more pink/blue baby versions.  My hubby wants an 'Earth Day' version. What about a 'Will you marry me?' version? So many ideas, so little time...

Anyway, so, here is my blog, I hope you find it marginally interesting and feel free to leave comments and suggestions. Oh, and I need to thank Amanda for being the inspiration for me to finally start this blog.  I wish each of you a very happy holiday.